


As summer turns to fall, many of us are left looking at our still-producing gardens and wondering, “What am I going to do with all this produce?” With all the time and effort that went into planning and maintaining your garden all season, it’s hard to imagine letting anything go to waste. While there are plenty of canning recipes, this time of year is busy and some of those methods are time consuming. We’re sharing a few simple ways you can preserve the flavors of summer and use them into the colder months.
Oven Dried Tomatoes
Oven-dried tomatoes are a quick, no-fail method for preserving a bumper crop of tomatoes. Much different from the dry, chewy sundried tomatoes you’re used to, these are incredibly sweet and tender. Add them to everything from scrambled eggs, to sandwiches, pasta salads, pastas, soups, casseroles — we promise you’ll be thinking of ways to work them into whatever you’re making.
What you’ll need:
- Sheet pans and clean jars for storage
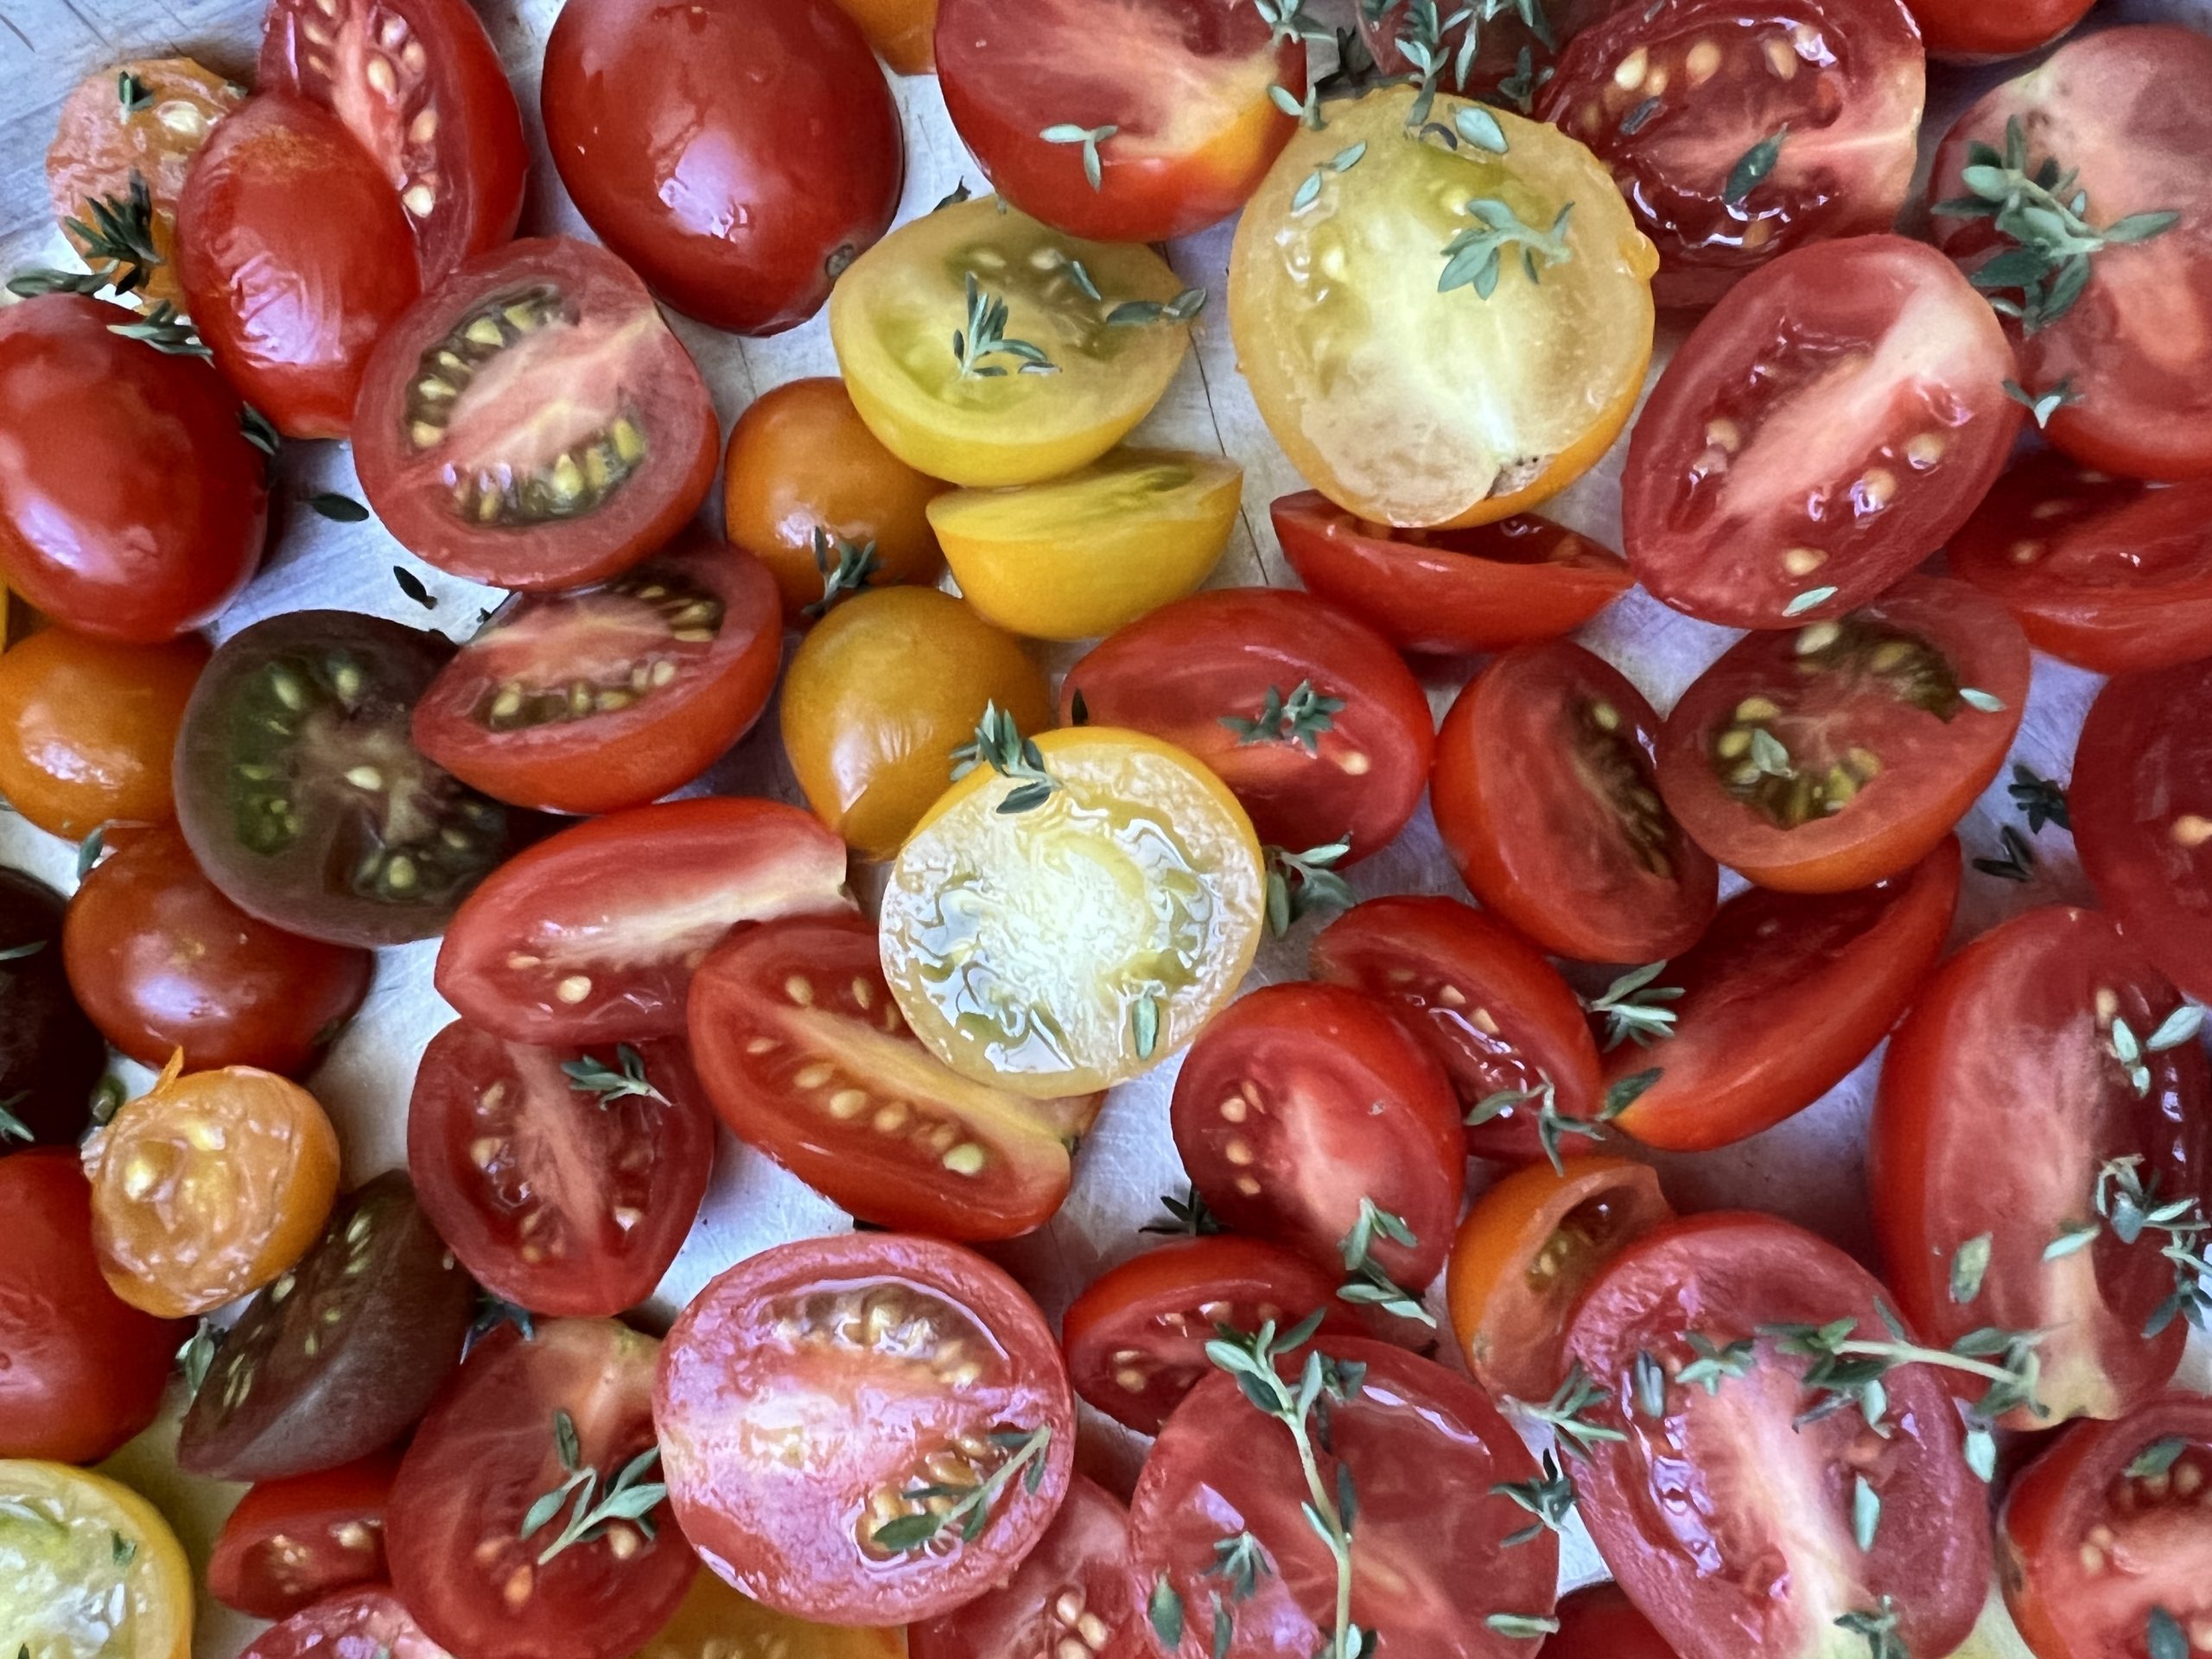
- Tomatoes, and lots of them. While you can use any variety of tomato, cherry, roma, or plum tomatoes are best because they are more uniform in size and hold together better once dried.
- Olive oil for drizzling
- Sea salt
- Herbs and spices, if desired.
Instructions:
Pre-heat your oven to 200 degrees.
Rinse and dry tomatoes. Slice in half lengthwise and place them cut-side up onto your baking sheets. If your tomatoes are large and juicy, you can use a spoon to scoop out some of the seeds and liquid.
Drizzle with olive oil and sprinkle with sea salt. You can also add any herbs or spices you may want to use (we used a little fresh thyme).
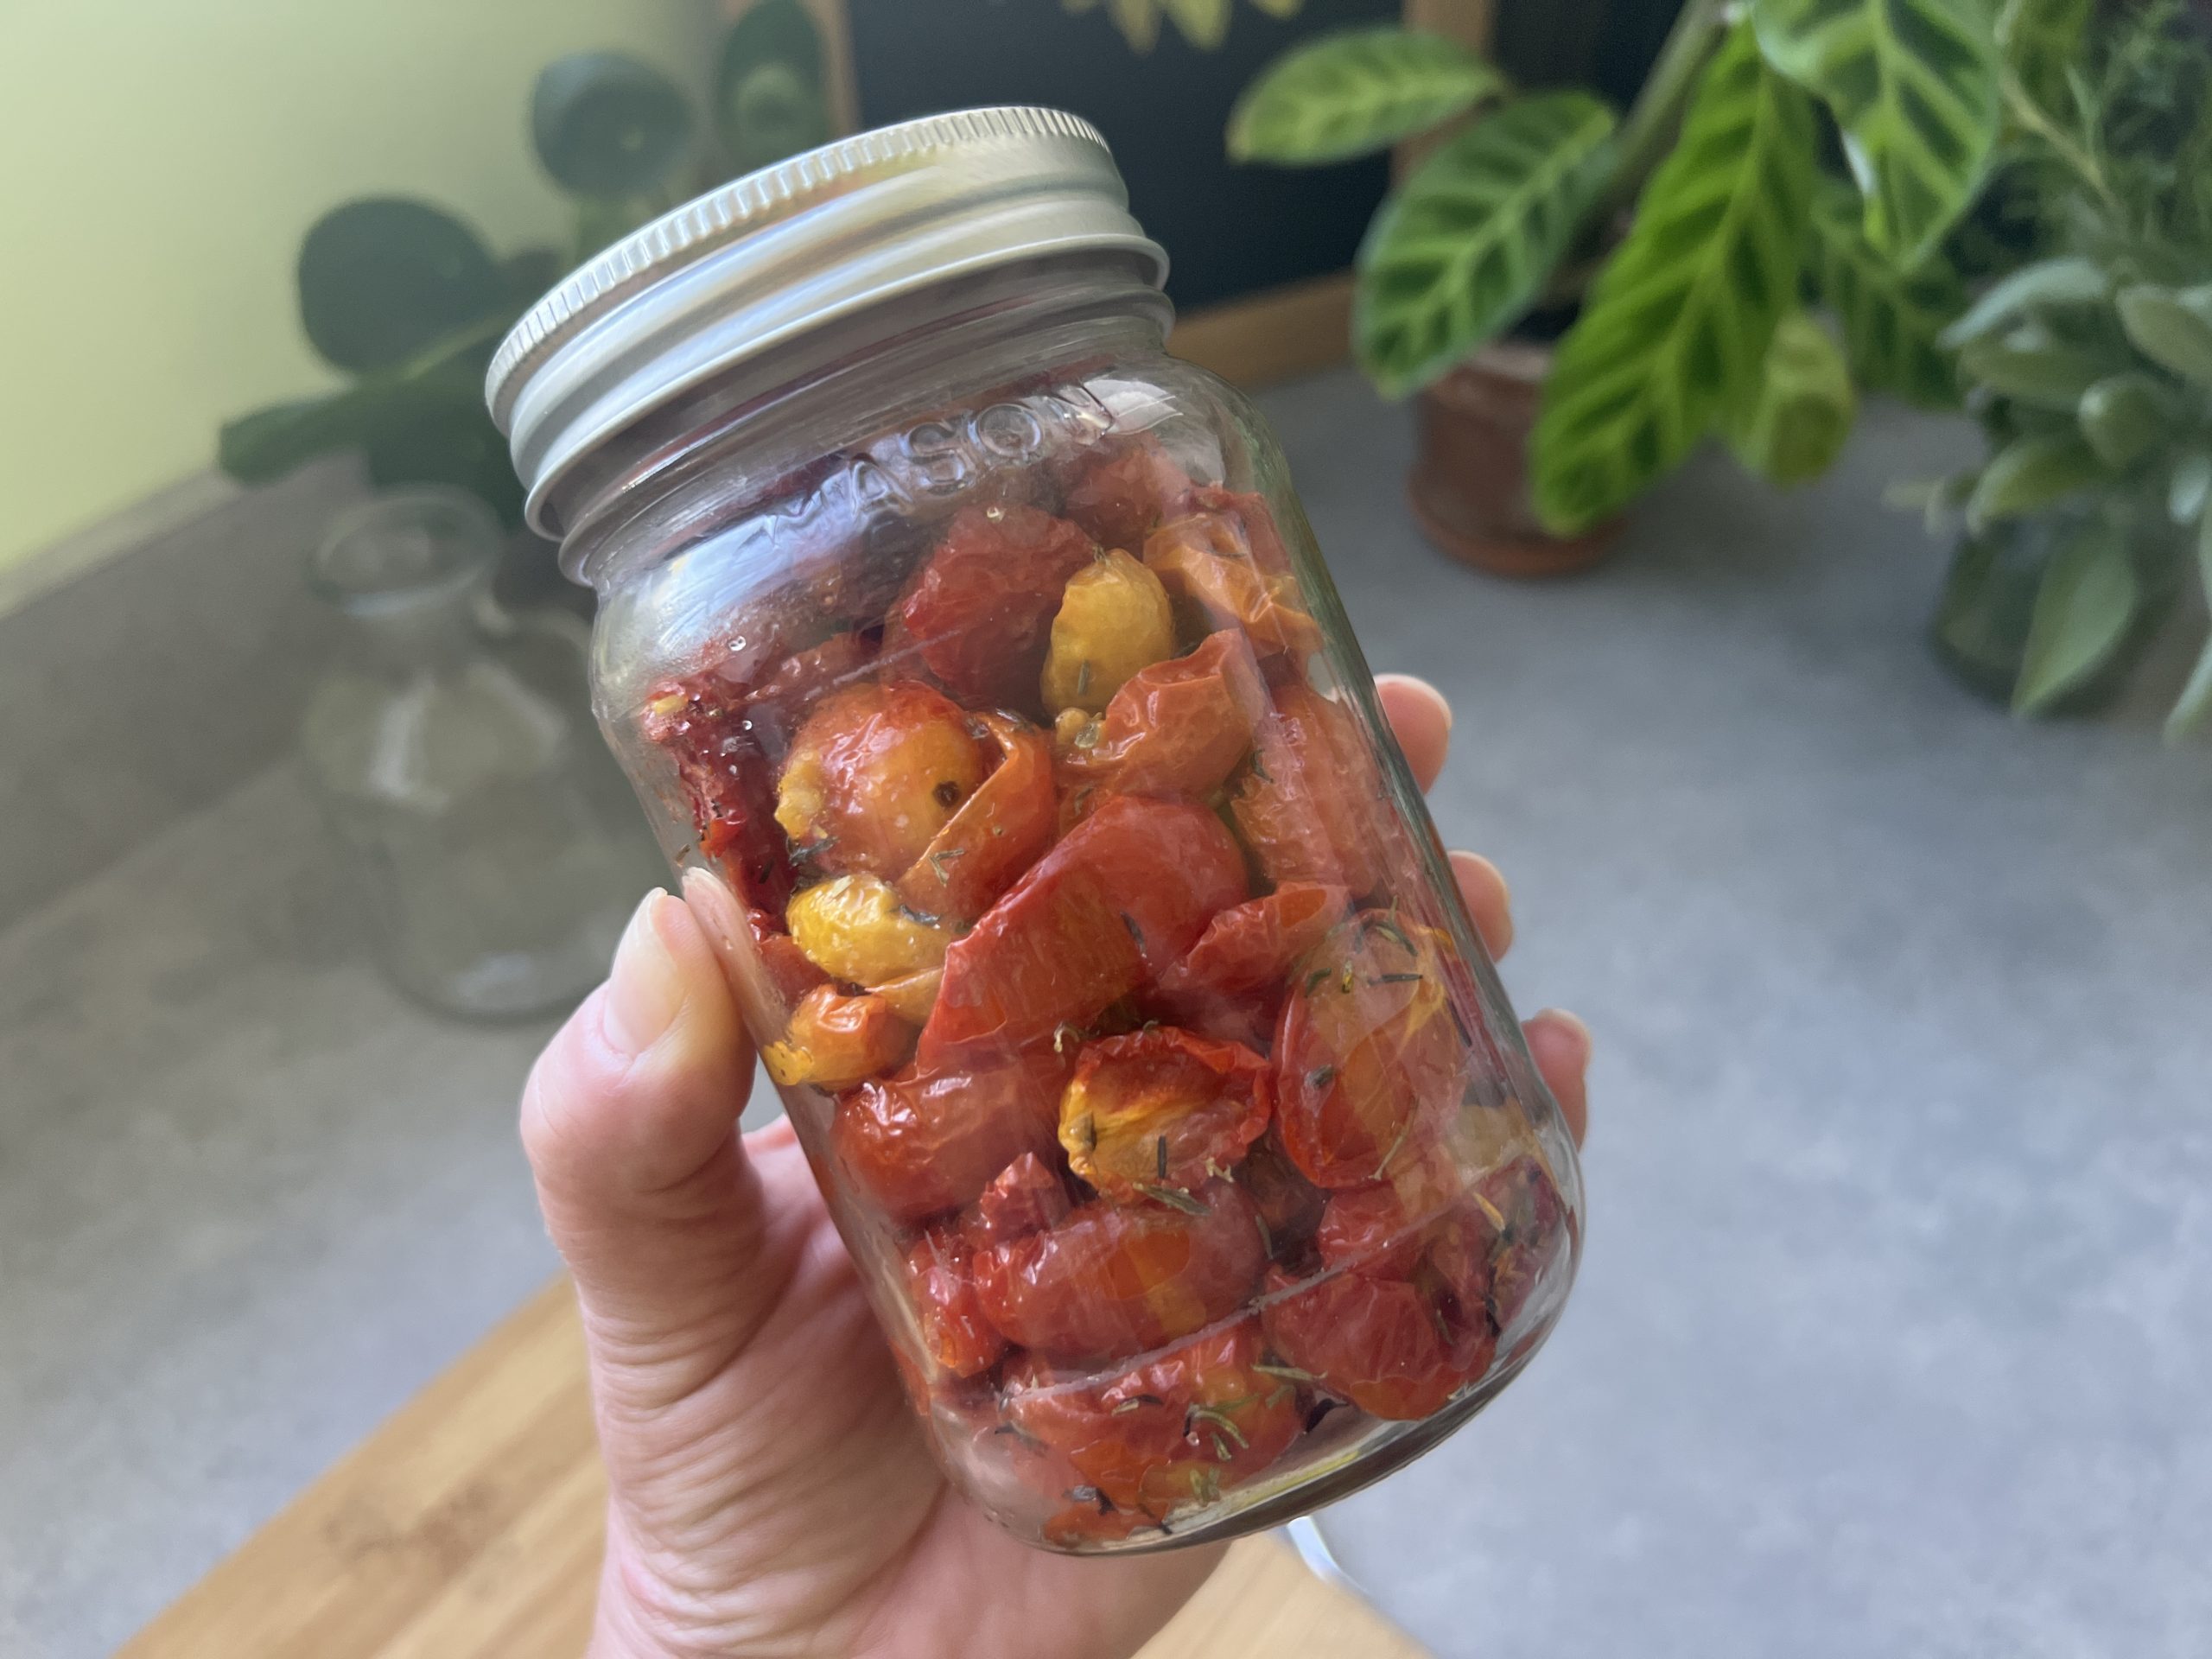
Place into the oven for 3-4 hours, or until they are shriveled around the edges.
Allow to cool, add them to jars and cover them in olive oil (this extends their shelf-life, though they must be kept refrigerated). You can add some garlic to your jar if you like and as a bonus, you now have an infused olive oil to enjoy long after your tomatoes have been devoured.
Refrigerate and enjoy within 2 months.
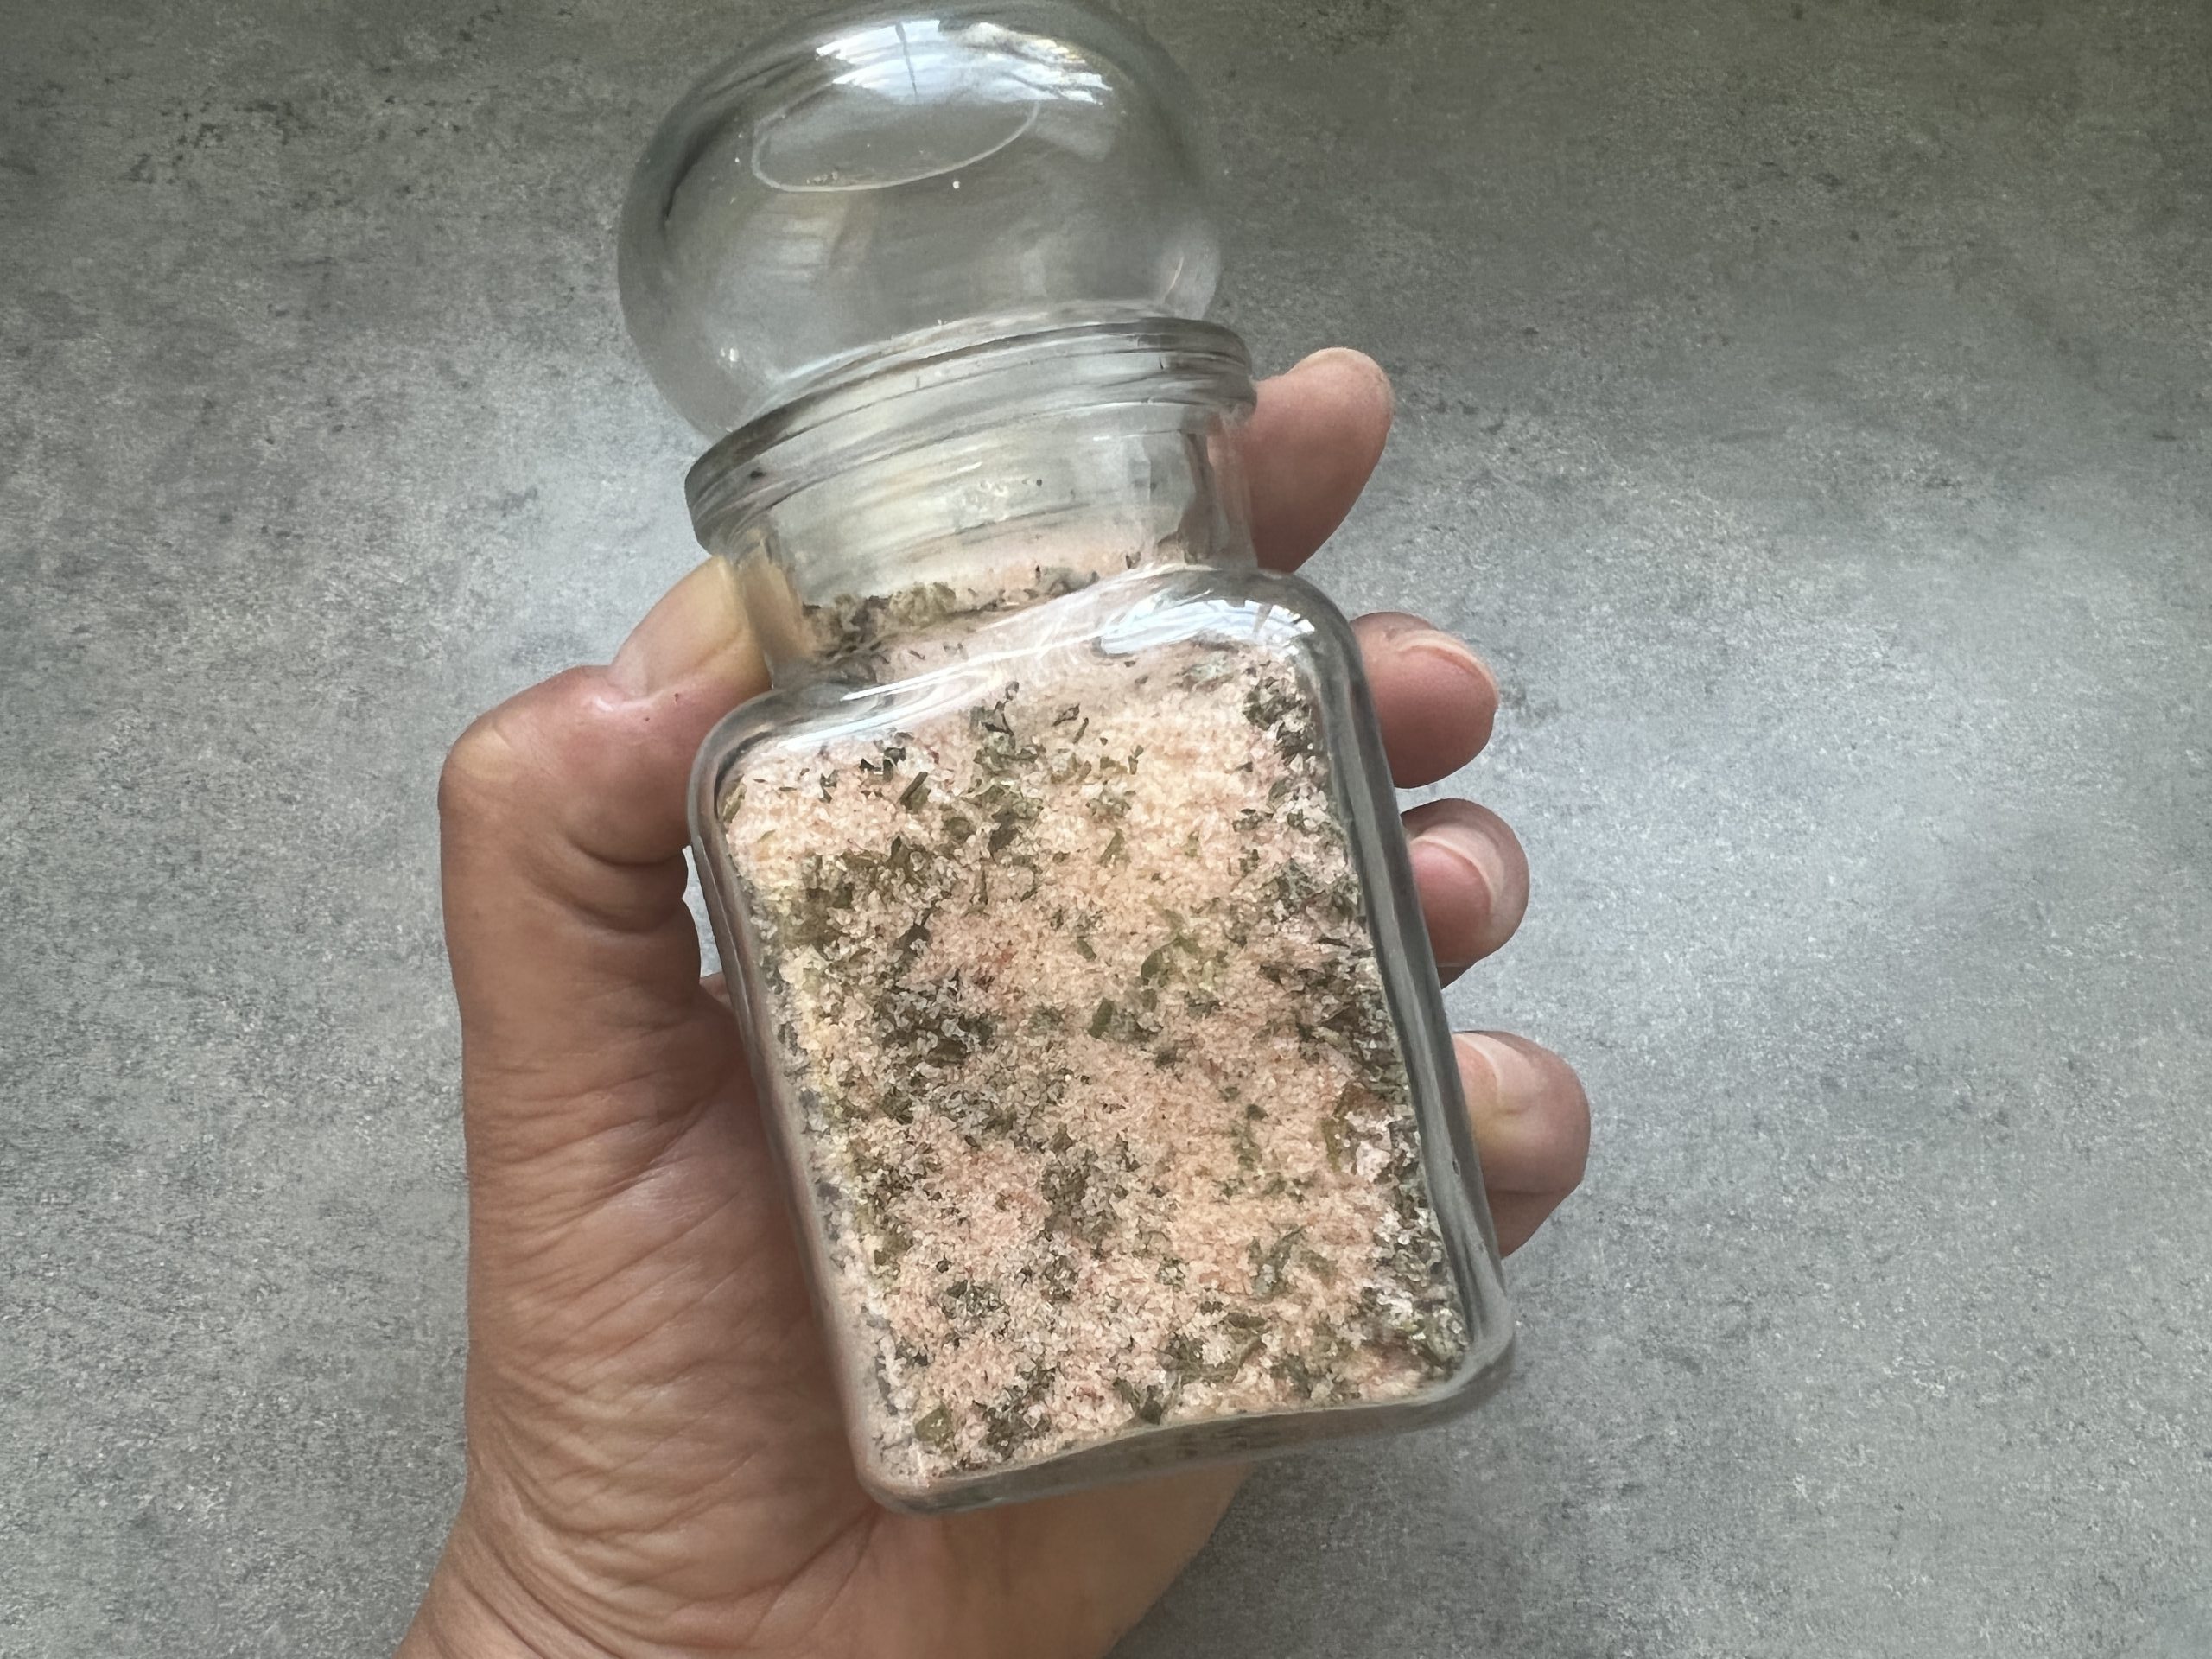
Herb Salt
If you find yourself with an abundance of herbs in your garden, try making herb salts!
What you’ll need:
- Clean jars or containers
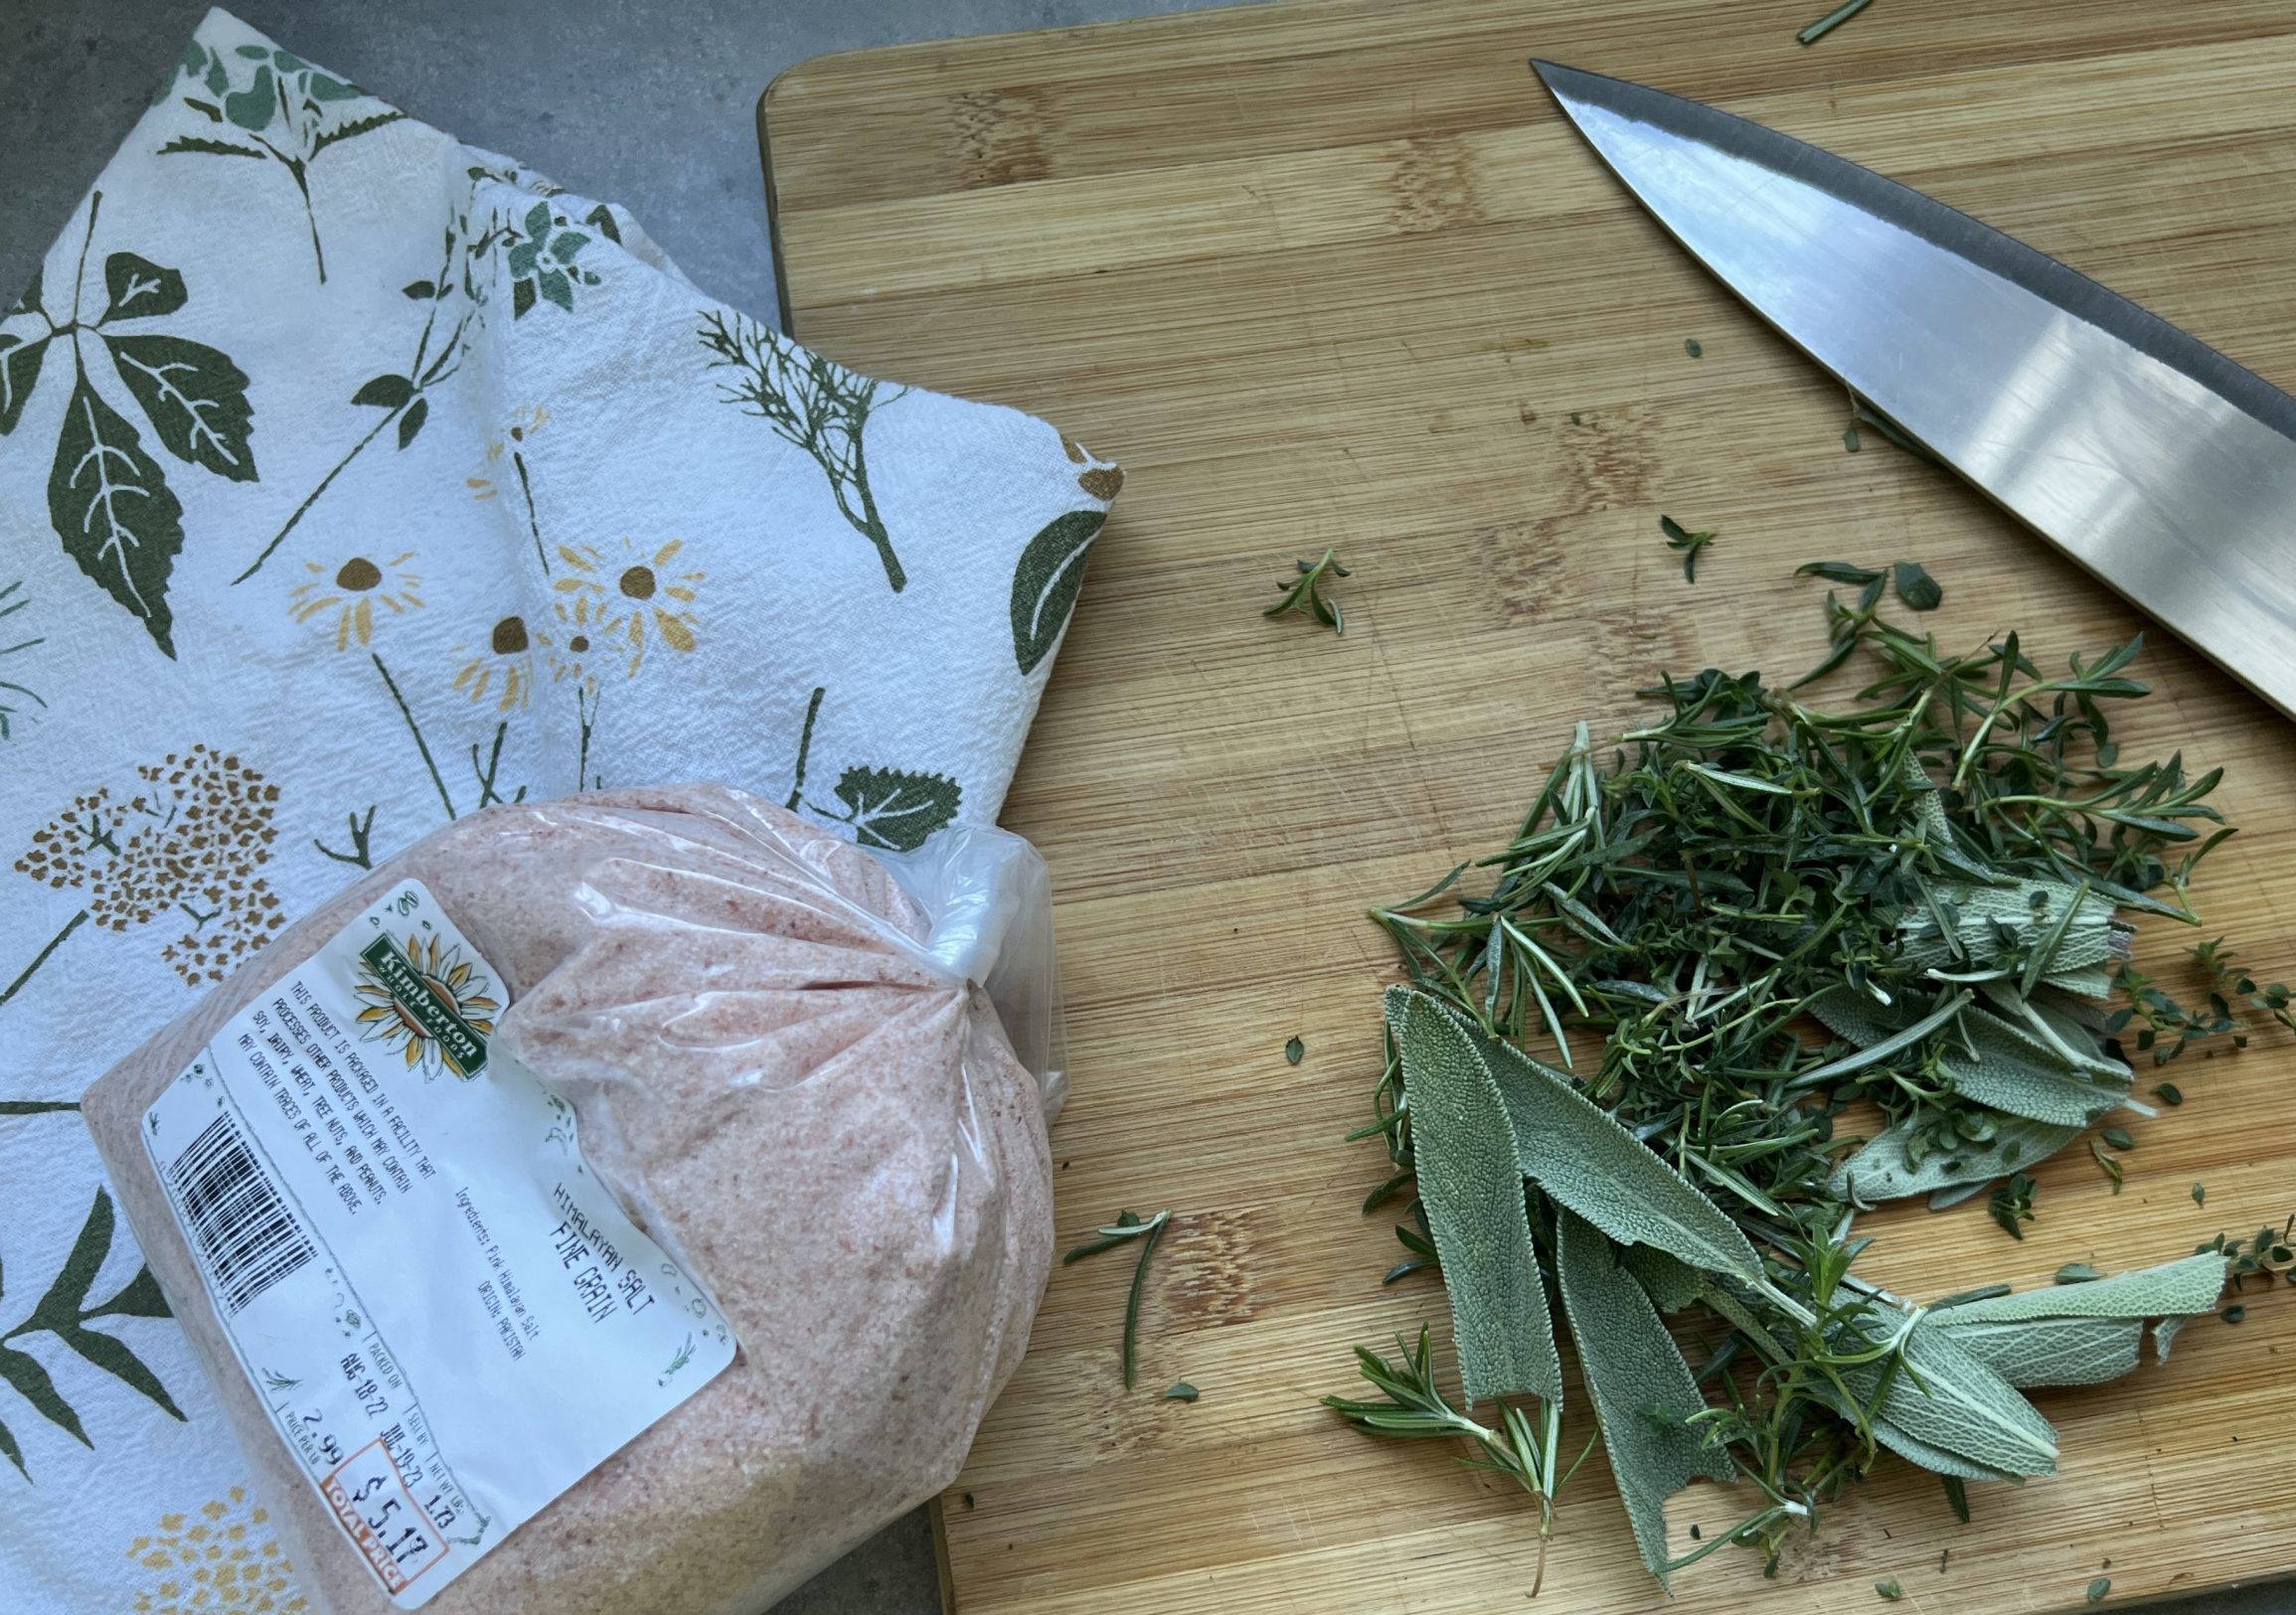
- Fresh herbs, either from your garden or store bought. This recipe is best with dry, hearty herbs like sage, thyme, rosemary, etc. You can use herbs like parsley, cilantro, and chives but because they contain more moisture, you’ll need to increase your drying time.
- Salt. Because this is more of a finishing salt, coarse salt is best. We chose Himalayan pink salt because of the added health benefits.
- Experiment by adding dried onion, garlic or your favorite dried spices to create unique custom blends.
Instructions:
Gather your herbs. We used sage, thyme, rosemary, and savory from the garden. Chop as fine as you like.
Combine herbs with salt and spread onto a baking sheet. If you have time and storage space, you can leave the sheet pan on the counter to let the herbs dry for 12-24 hours. If you are looking for a speedier method, preheat your oven to 170 degrees. When the temperature is reached, place the sheet pan inside but turn off the heat and allow to sit for an hour or so.
Because of the moisture in the herbs, some of the salt may have clumped a bit and you can break it up as you place into your jars and containers. Add a ribbon and you have a great homemade host or holiday gift.
Use within 6 months before the herbs begin to lose their potency.
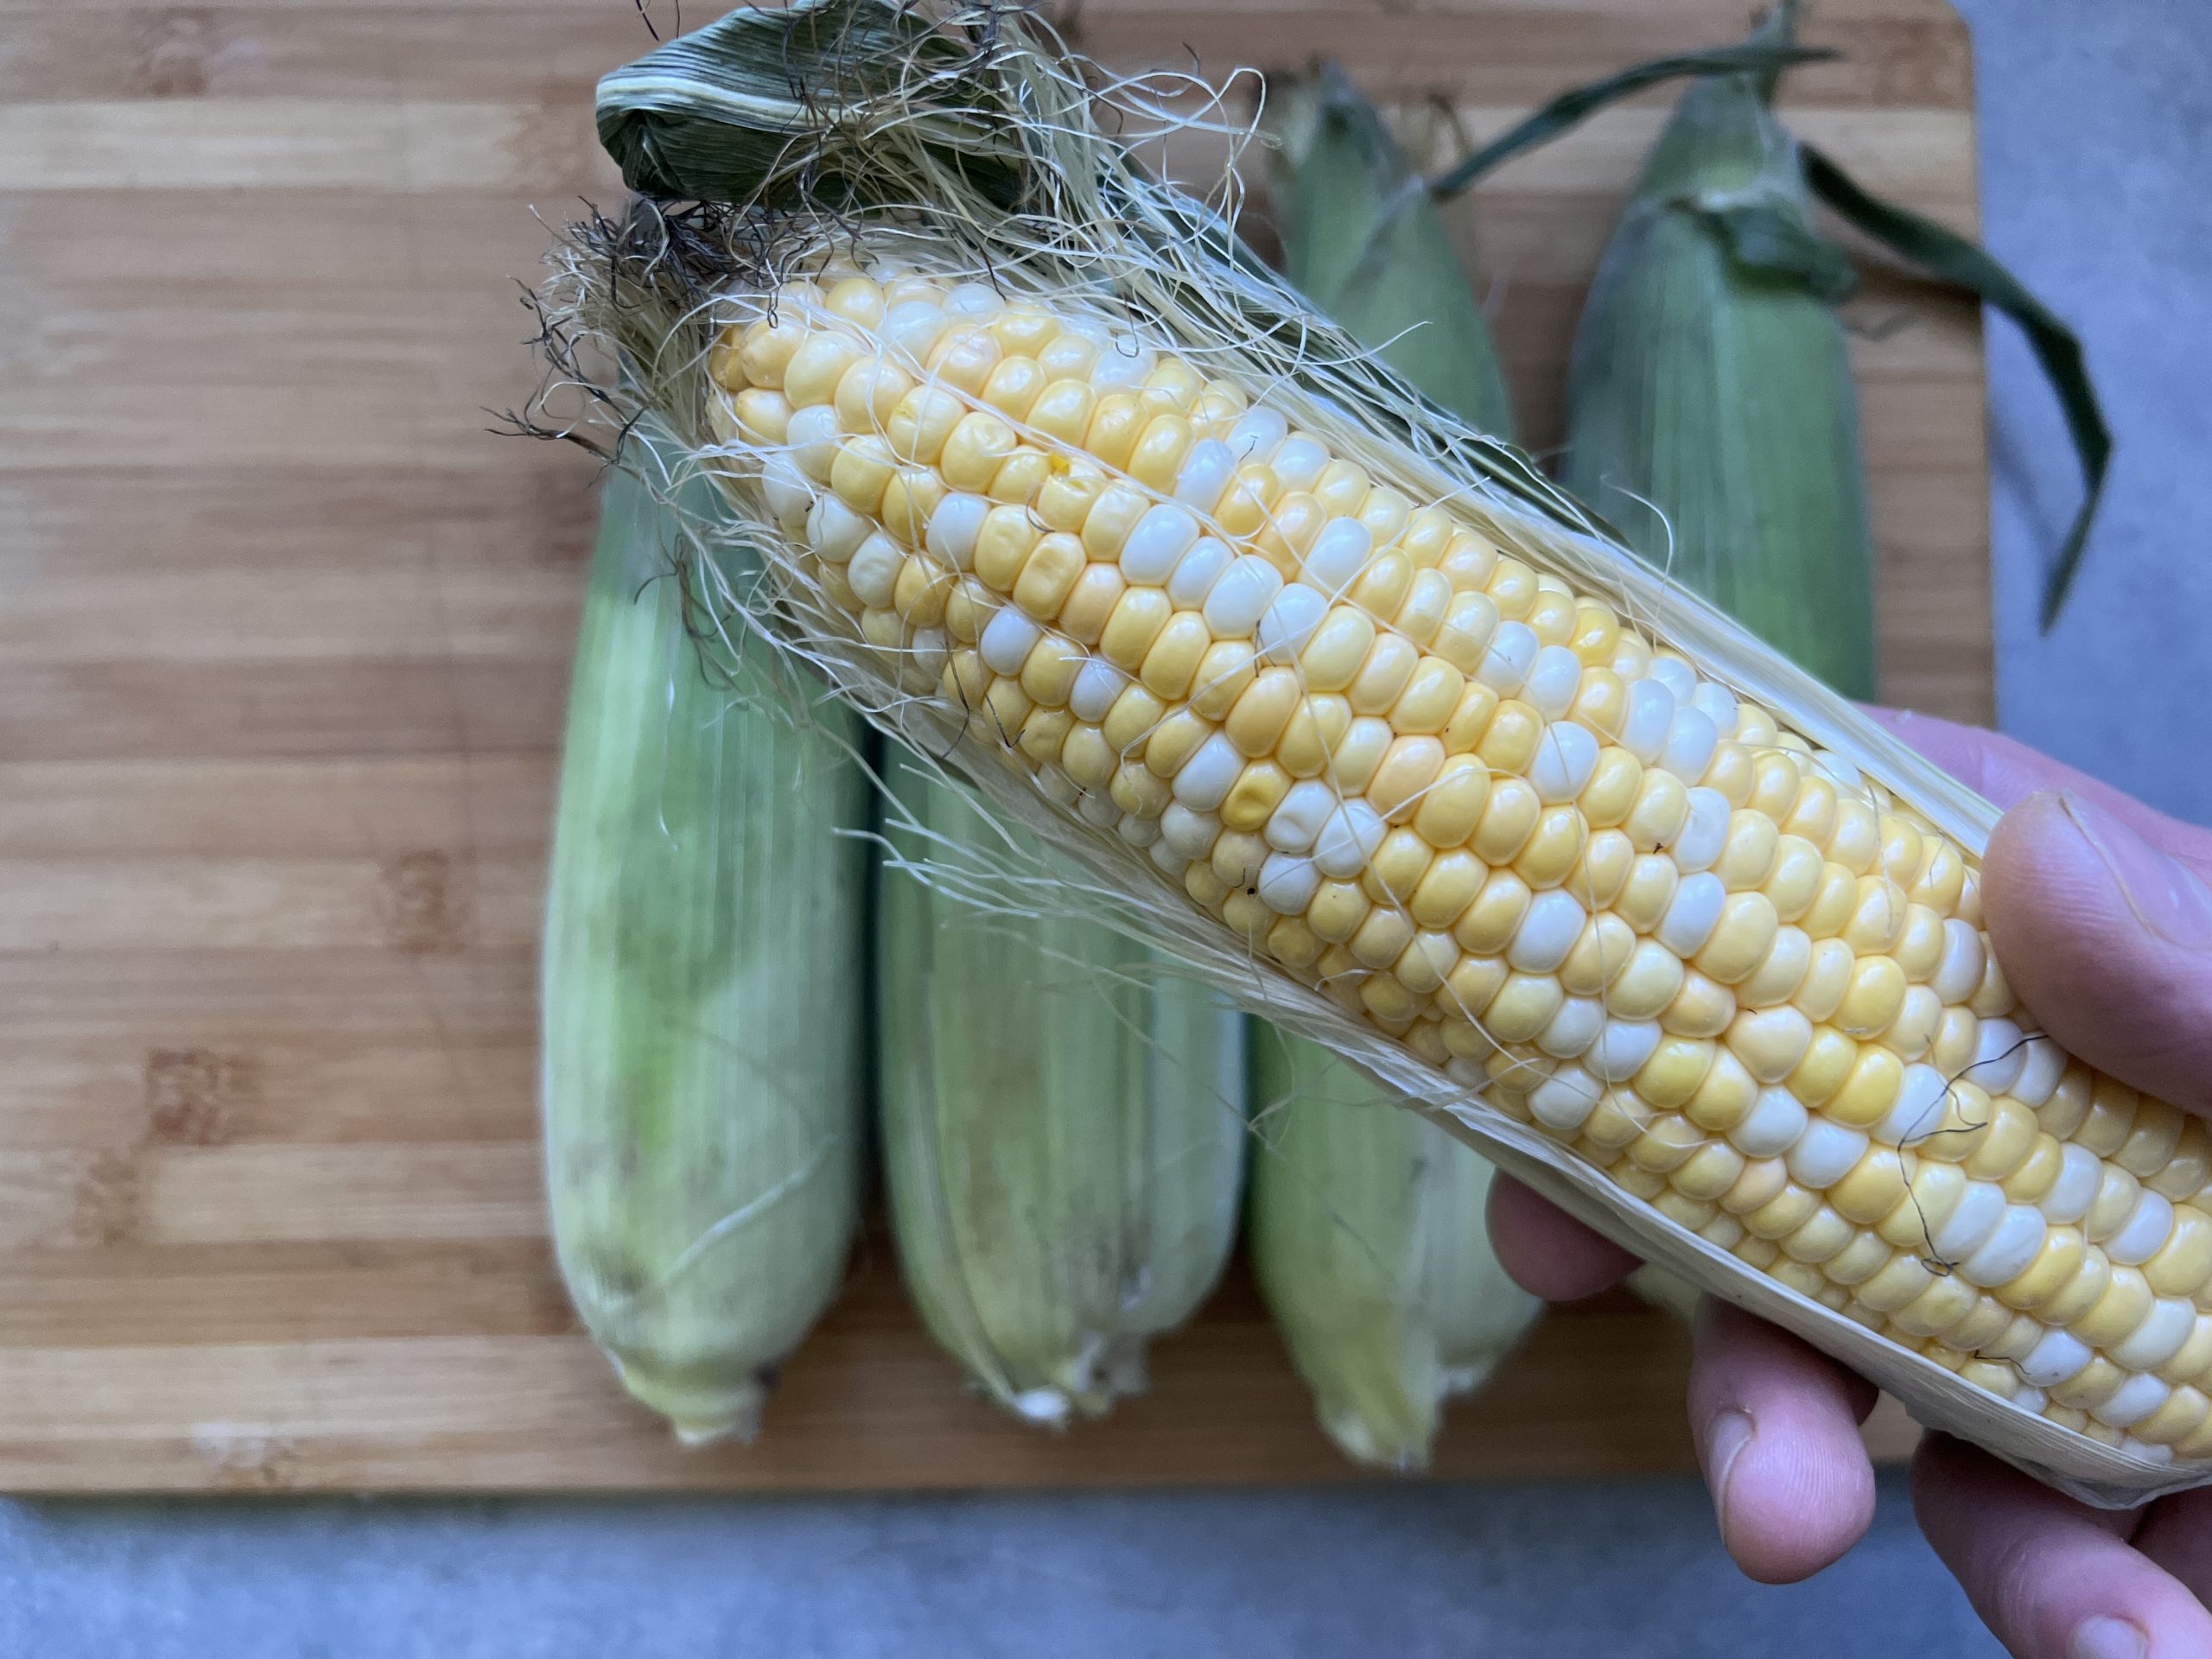
Corn
One of the highlights of the summer season is easily fresh corn. In a few simple steps, you can freeze your own and you’ll find it tastes much better than store bought frozen corn. Add it to soups, stews, casseroles, or enjoy as a side dish.
Instructions:
Shuck as many cobs as you have containers and freezer space for space for. Trying to get as much silk off as possible.
Next, blanch the corn. This will preserve its taste, texture, and color as well as kill any dirt or bacteria. Bring a pot of water to a boil, add whole corn cobs and return to a boil. Boil for 3 minutes and remove from the pot, immediately placing them in a large bowl of ice water to stop the cooking process.
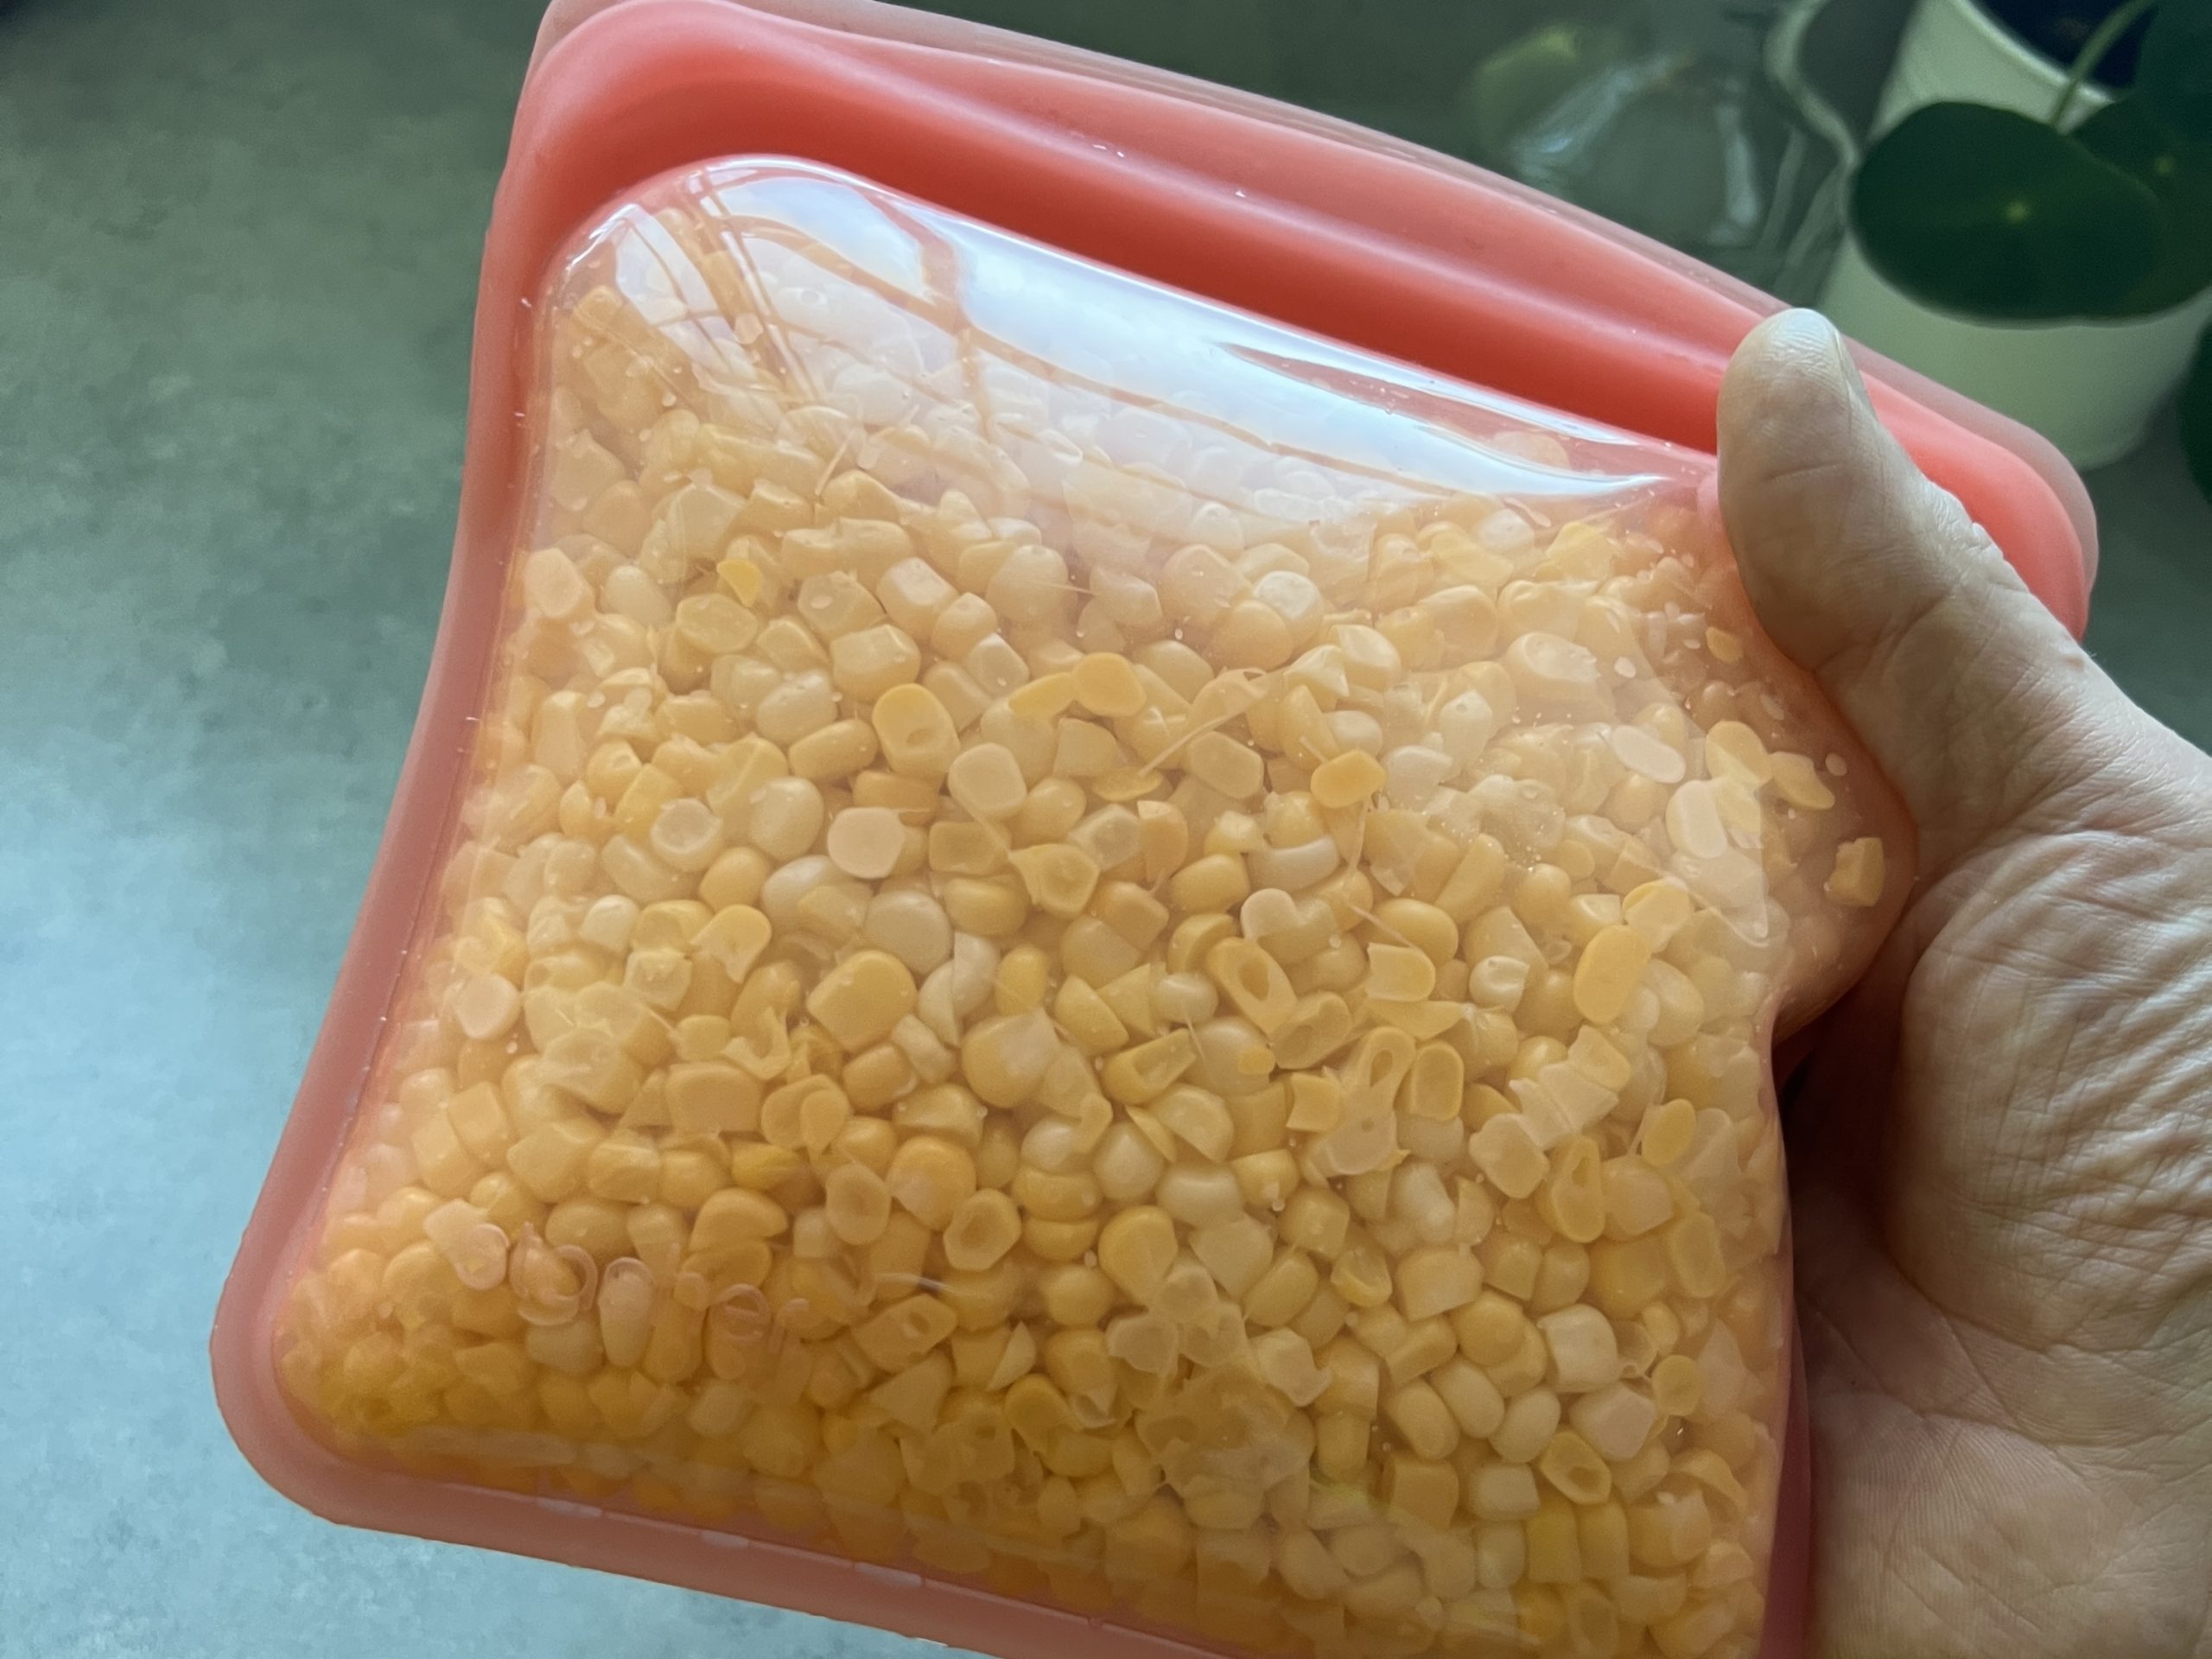
Once the corn cobs are cool to the touch, use a sharp knife to remove the kernels from the cob. Once you have removed the corn kernels from all of the cobs, let it air dry (to keep it from clumping together when frozen) for at least an hour before packing it into containers. Fill jars or Food Saver, Ziploc, and reusable bags (we used one from Stasher bags) trying to remove as much air as possible which will prevent freezer burn.
Label, date, and freeze. Frozen corn can be stored and used for up to a year.
Quick-pickled peppers
Great as a condiment, side, or snack — this recipe is extremely versatile and can be tailored to whatever you have an abundance of, and how salty, sweet, or spicy you like it.
What you’ll need:
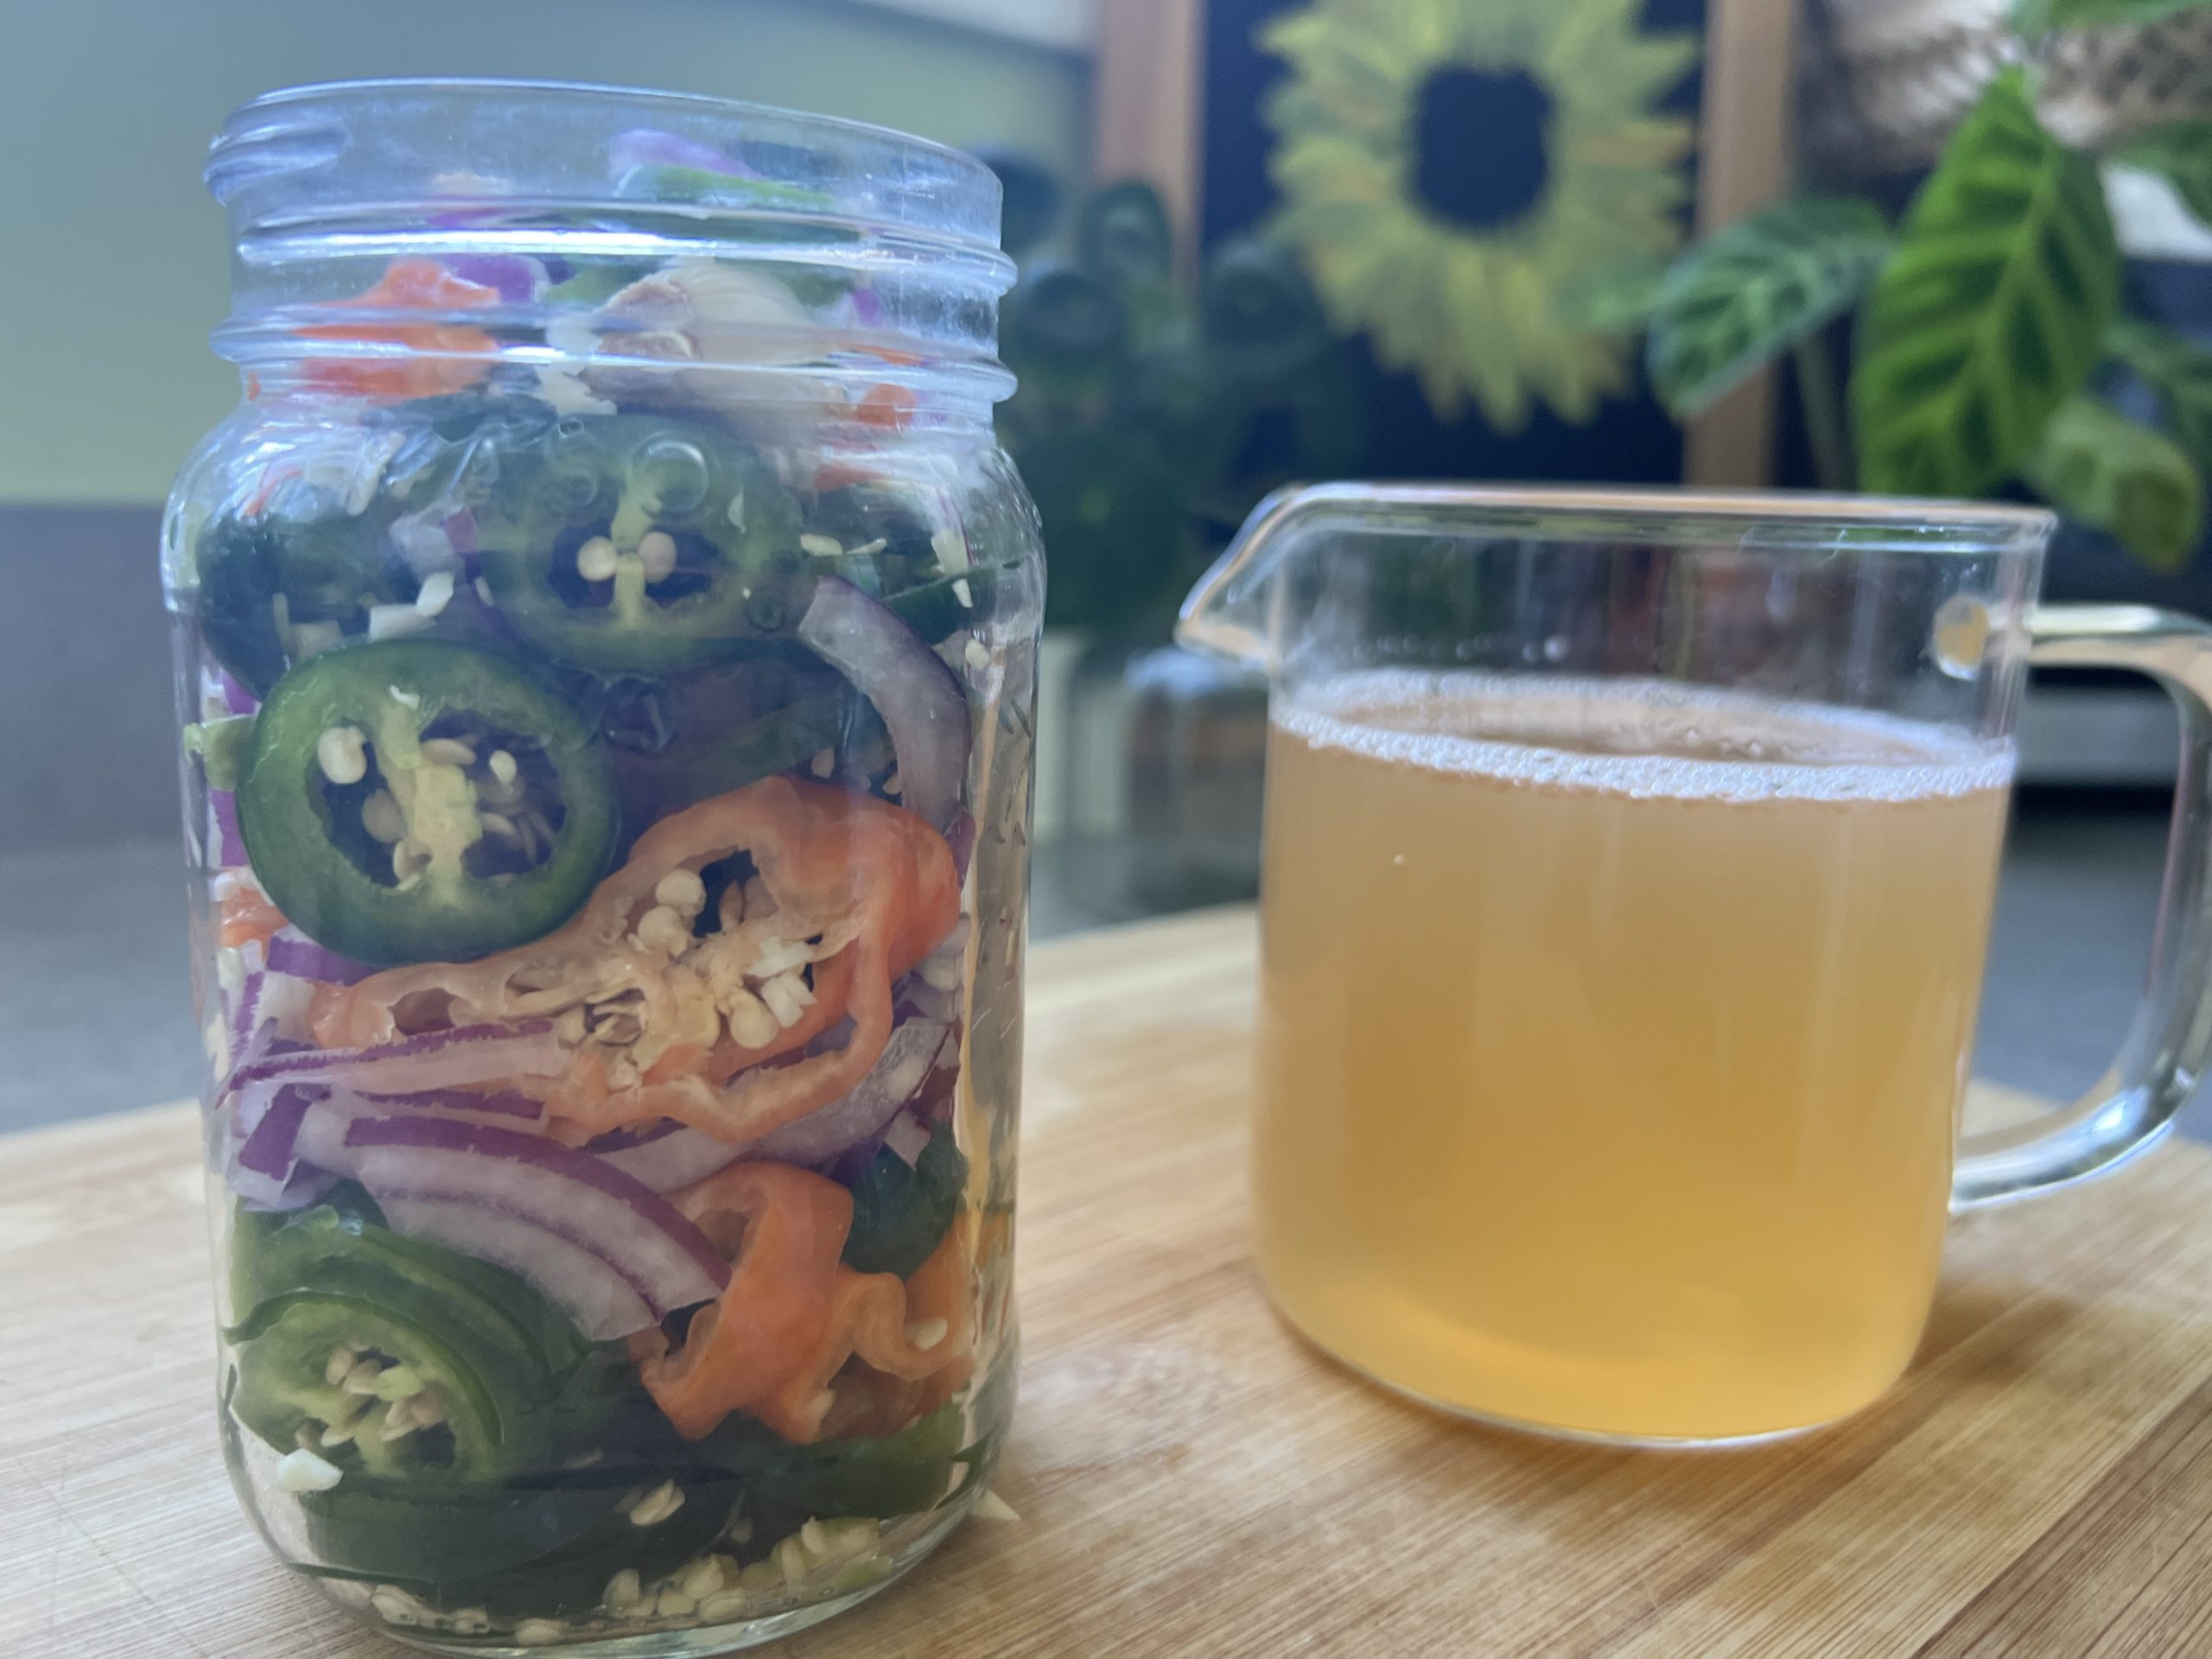
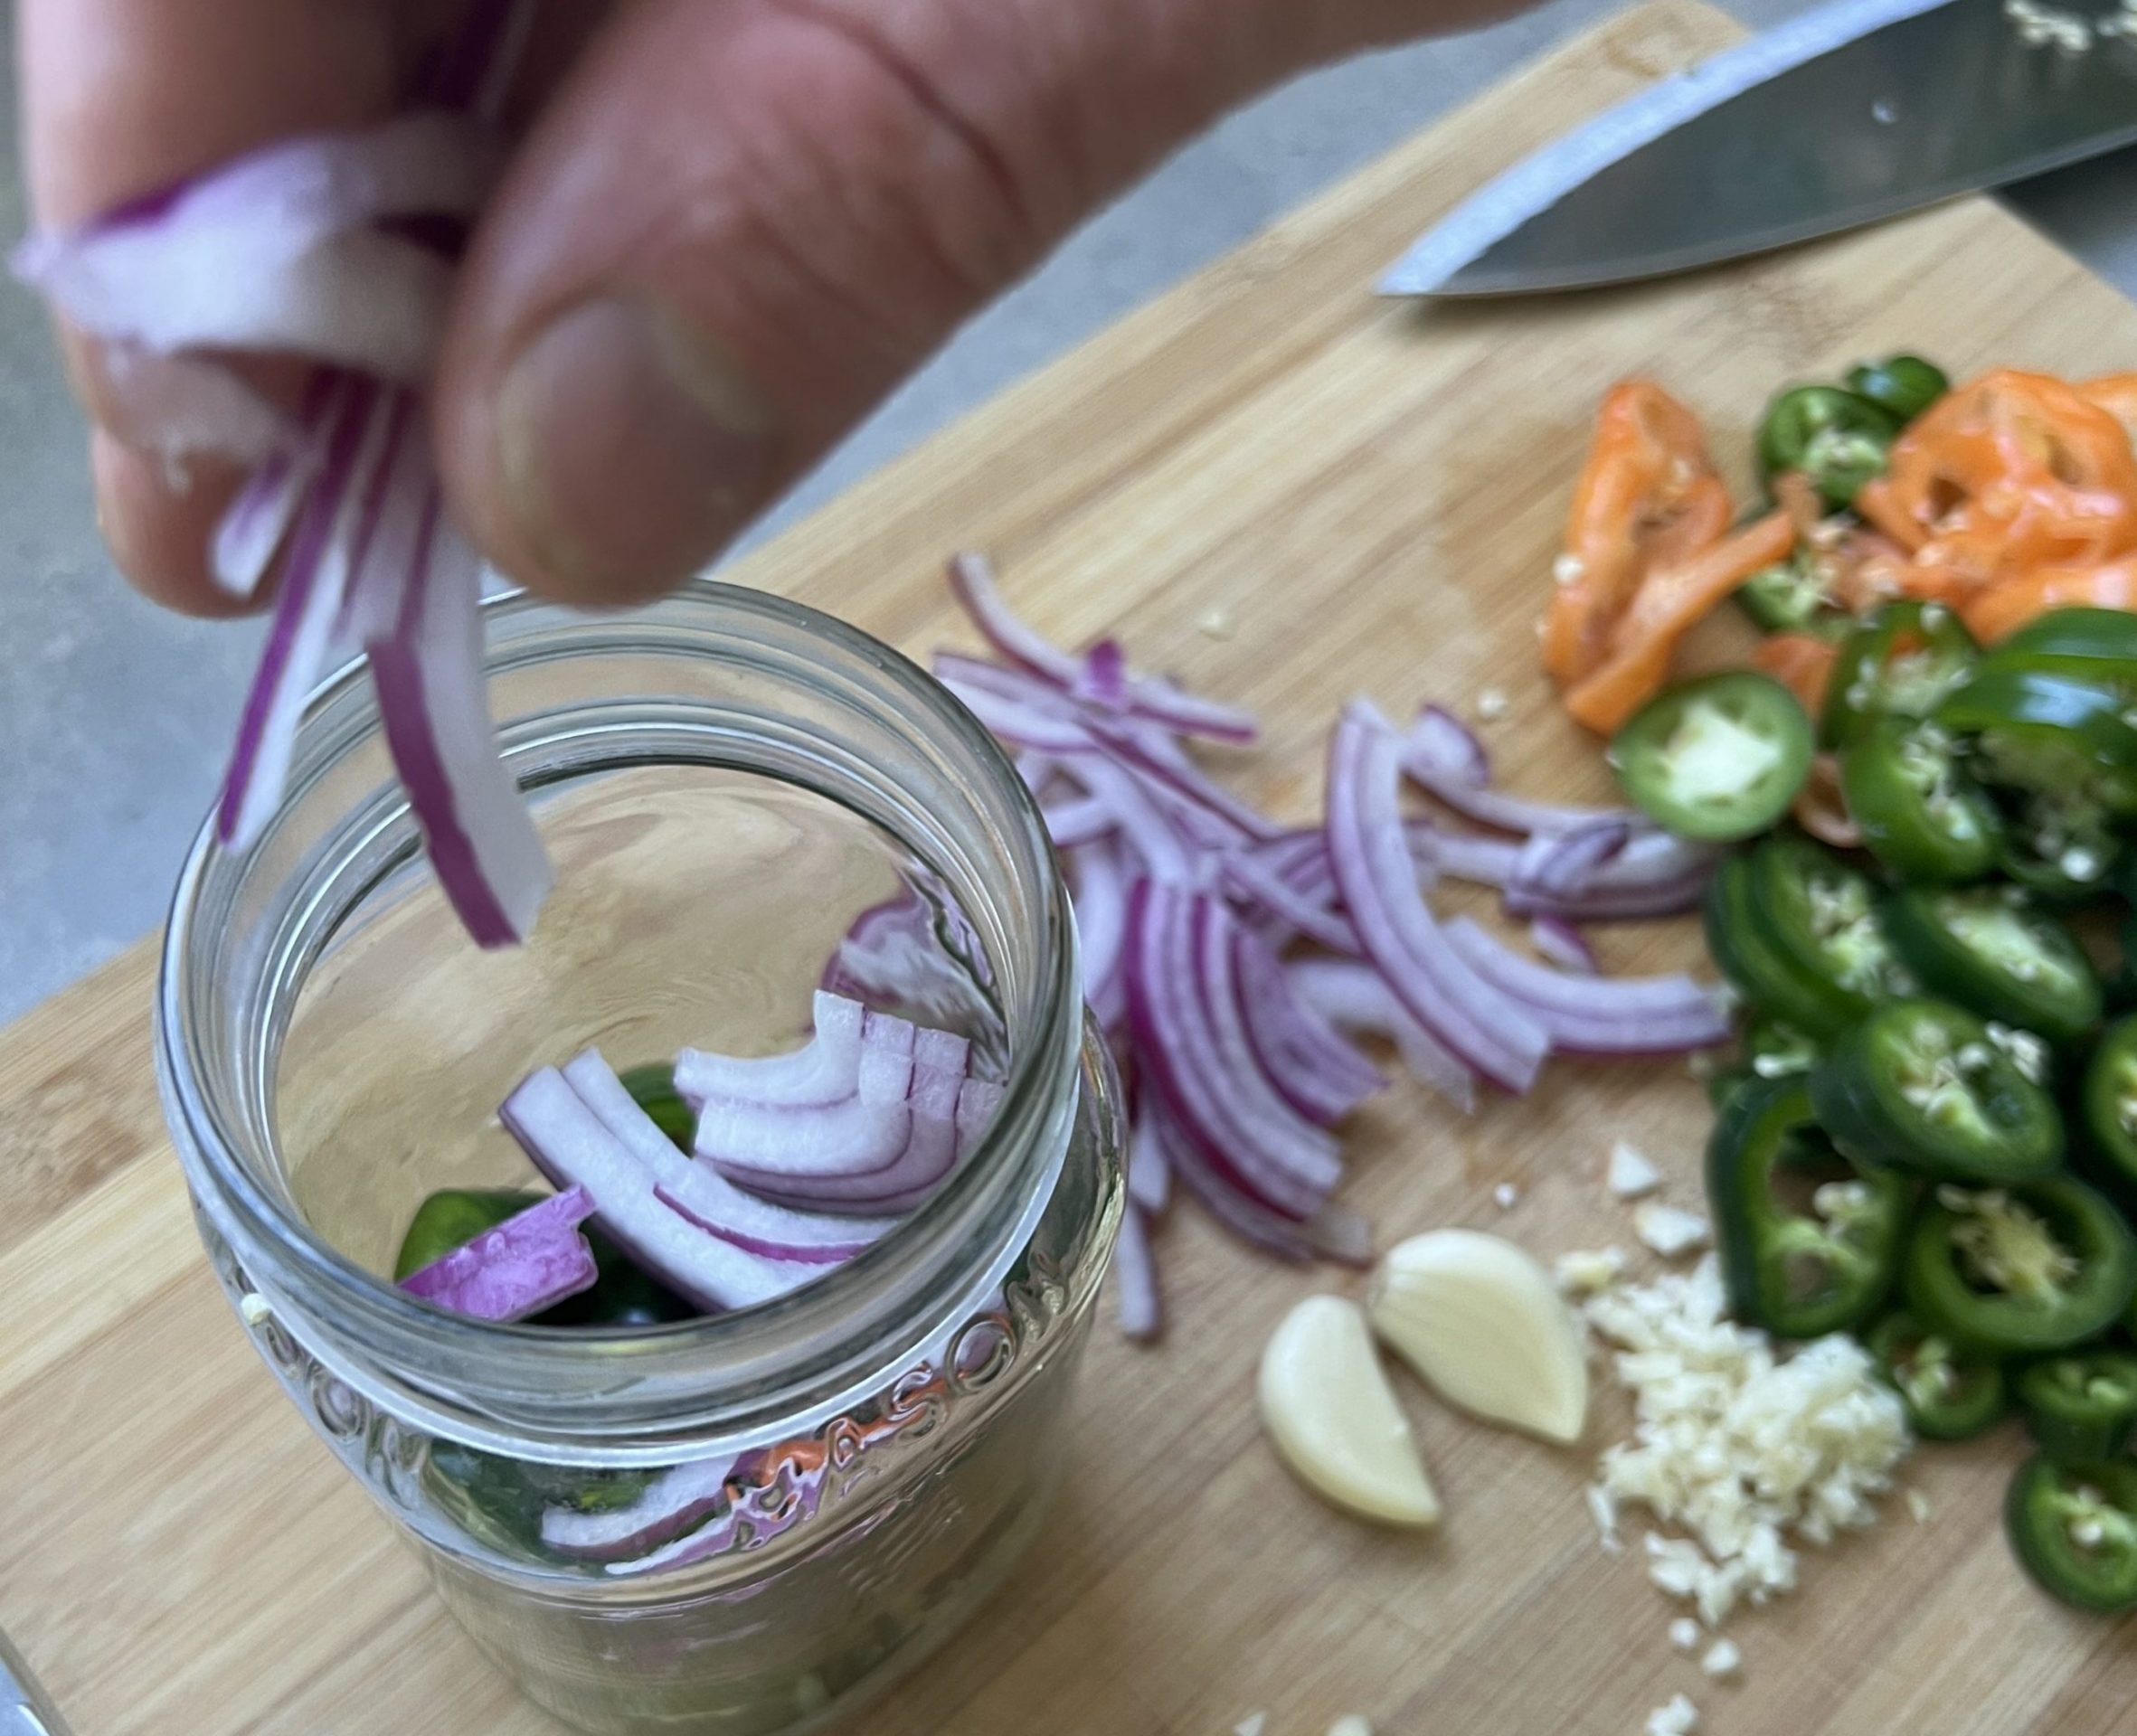
At least 1 clean jar with a tight fitting lid — we used a classic Mason jar but also encourage cleaning, saving, and re-using jars.
- 1lb peppers of your choice (this should fill about 1 pint-sized jar). We used a mix of jalapeno and habanero peppers.
- ¼ cup red onion, chopped
- 3 cloves garlic, minced
- 1 cup water
- 1 cup white or apple cider vinegar
- 1 tbsp. salt
Like things on the sweeter side? Add 1-2 tbsp. sugar to taste. Be creative — add your favorite herbs and spices to create a custom blend all your own.
Instructions:
Wash and dry peppers.
Slice peppers as thin or as thick as you like. Chop red onion and mince garlic.
Layer peppers, onion, and garlic into the jar.
In a measuring cup with a spout, mix water, vinegar, salt and any other ingredients you wish to add.
Pour into the jar to the top, making sure peppers are completely covered.
Refrigerate immediately, let sit for about a week and enjoy! Once opened, these are best used within 30 days.